Blenders are essential kitchen appliances that make our lives easier when it comes to food preparation. They are versatile tools used for a variety of tasks, from creating smoothies and purees to crushing ice and blending ingredients for soups and sauces. But have you ever wondered how a blender actually works? In this article, we will delve into the inner workings of a blender and explore the fascinating mechanisms that allow it to blend ingredients seamlessly.
The Components
To understand how a blender works, let's start by exploring its key components:
- Motor: The heart of a blender is its powerful electric motor. This motor is responsible for driving the blades and creating the necessary rotational force to blend the ingredients.
- Blades: The blades of a blender are typically made of stainless steel and are strategically positioned at the bottom of the blender jar. They are designed to create a vortex, pulling the ingredients downwards and forcing them towards the bottom of the jar for efficient blending.
- Blender Jar: The blender jar, also known as the pitcher or container, is where the ingredients are placed for blending. It is typically made of plastic, glass, or stainless steel and comes with a secure lid that prevents any spills or splatters during the blending process.
- Controls: Blenders usually feature control buttons or switches that allow users to operate the blender at different speeds or with specific blending functions. These controls vary depending on the blender model and may include options like pulse, low, medium, and high speeds.
The Blending Process
Now that we understand the components, let's explore how a blender actually blends ingredients:
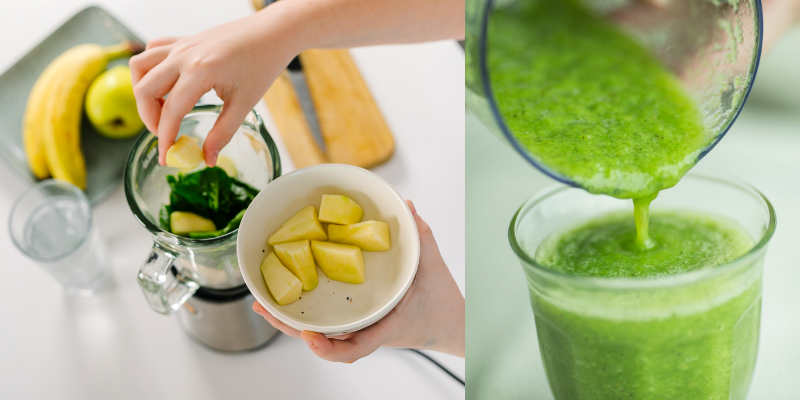
- Preparation: Before using the blender, it's important to prepare the ingredients accordingly. This may involve peeling and chopping fruits or vegetables, adding liquids for smoother blending, or adjusting ingredient quantities based on the desired recipe.
- Loading the Blender Jar: Once the ingredients are ready, they are placed inside the blender jar. It's important not to overfill the jar, as it may lead to uneven blending or spills during the process.
- Securing the Lid: The blender lid is then securely placed on top of the jar, ensuring a tight seal to prevent any leakage or accidents during blending.
- Powering On: When the blender is powered on and the desired speed or function is selected, the electric motor is activated. The motor rotates the blender blades at high speeds, creating a whirlpool effect inside the jar.
- Blending Action: As the blades spin rapidly, they create a vortex that pulls the ingredients towards the bottom of the jar. This movement forces the ingredients to circulate and come into contact with the sharp blades, resulting in their breakdown and blending.
- Achieving the Desired Consistency: The duration of blending determines the final consistency of the ingredients. For example, a shorter blending time may result in a chunkier texture, while a longer blending time will yield a smoother and more homogeneous mixture.
- Adjusting Speed and Pulse: Some blenders offer speed control options or a pulse function. Speed control allows users to adjust the blender's motor speed based on the ingredients being blended. The pulse function provides short bursts of power, allowing for more precise control over the blending process.
- Safety Features: Many blenders are equipped with safety features that prevent the blender from operating unless the lid is securely in place. This ensures that there are no accidents or spills during the blending process.
- Stopping and Pouring: Once the blending process is complete, the blender is powered off, and the lid is removed. The blended mixture can then be poured out of the jar for serving or further processing, depending on the recipe.
Cleaning and Maintenance
After using a blender, it's important to clean and maintain it properly. Here are some tips for cleaning and maintaining your blender:
- Disassembly: Before cleaning, disassemble the blender by removing the jar, lid, and blade assembly. Check the manufacturer's instructions for specific disassembly guidelines.
- Rinse Immediately: Rinse the blender jar and lid with warm water immediately after use to prevent any residue from drying and becoming difficult to remove.
- Hand Wash or Dishwasher: Depending on the blender model, the jar and lid may be dishwasher-safe. If not, hand wash them using a mild dish soap and a non-abrasive sponge or brush. Be cautious when handling the sharp blender blades.
- Blade Cleaning: Pay special attention to cleaning the blender blades. Use a brush or sponge to remove any stubborn food particles or residue. Be careful not to cut yourself while cleaning the sharp blades.
- Dry Thoroughly: After washing, dry all the blender components thoroughly before reassembling or storing. This helps prevent the growth of mold or bacteria.
- Cleaning the Motor Base: To clean the motor base, use a damp cloth or sponge to wipe away any spills or splatters. Do not submerge the motor base in water or other liquids.
- Storing: When not in use, store the blender in a clean and dry location. Ensure that all the parts are completely dry before assembling or storing to prevent moisture-related issues.
- Blade Maintenance: Periodically check the blender blades for any signs of wear or damage. If the blades become dull or damaged, consult the manufacturer's instructions for blade replacement.
- Motor Overheating: If you notice that the blender motor is overheating or emitting a burning smell during use, immediately turn off the blender and allow it to cool down. This could indicate an issue with the motor and may require professional attention.
- Regular Maintenance: Follow the manufacturer's recommended maintenance guidelines, such as oiling the blender's bearings or other specific maintenance tasks, if applicable.
By following these cleaning and maintenance practices, you can keep your blender in optimal condition and ensure its longevity.

Conclusion
Blenders are efficient kitchen appliances that simplify the blending process for various recipes. Understanding how a blender works allows you to make the most of its capabilities and achieve the desired consistency for your culinary creations. With its powerful motor, sharp blades, and well-designed jar, a blender efficiently blends ingredients to create smoothies, purees, soups, sauces, and more. By properly cleaning and maintaining your blender, you can prolong its lifespan and continue enjoying its benefits for years to come. So, the next time you use your blender, appreciate the intricate mechanics behind its smooth blending action and savor the delicious results it helps you achieve.